HEM’s Application Portal offers endless customization options when it comes to building the perfect form. To start, first click on ‘Applications Forms’ in the left-hand portal menu.

Then, select ‘Add New’ in the top right-hand corner.

Select the application type on the dropdown menu.

Add General Application Details
HEM’s application portal builder is organized into steps. In the first menu, you can add general information related to your application such as its title, layout, invoice options, applicable fees and description.
HEM’s portal can customize application form options with features specific to different school needs such as ‘Login is not required’ or ‘Enable review page’ by simply checking a box.
Once you’ve added your information, click ‘Next’.

The next window allows you to select a new payment type, payment method(s) and tax options. Once the payment type has been selected and the other fields have been filled in, click ‘Next’.

After your central application details are sorted, you can begin the customization process. In the second menu, you can set the colours for your application form, as well as add in any custom CSS or javascript if needed.

Next, press the ‘Create Application’ button in the bottom right-hand corner.

Customize Your Application
After creating your application, you will be brought to HEM’s application builder to customize your form sections and fields.
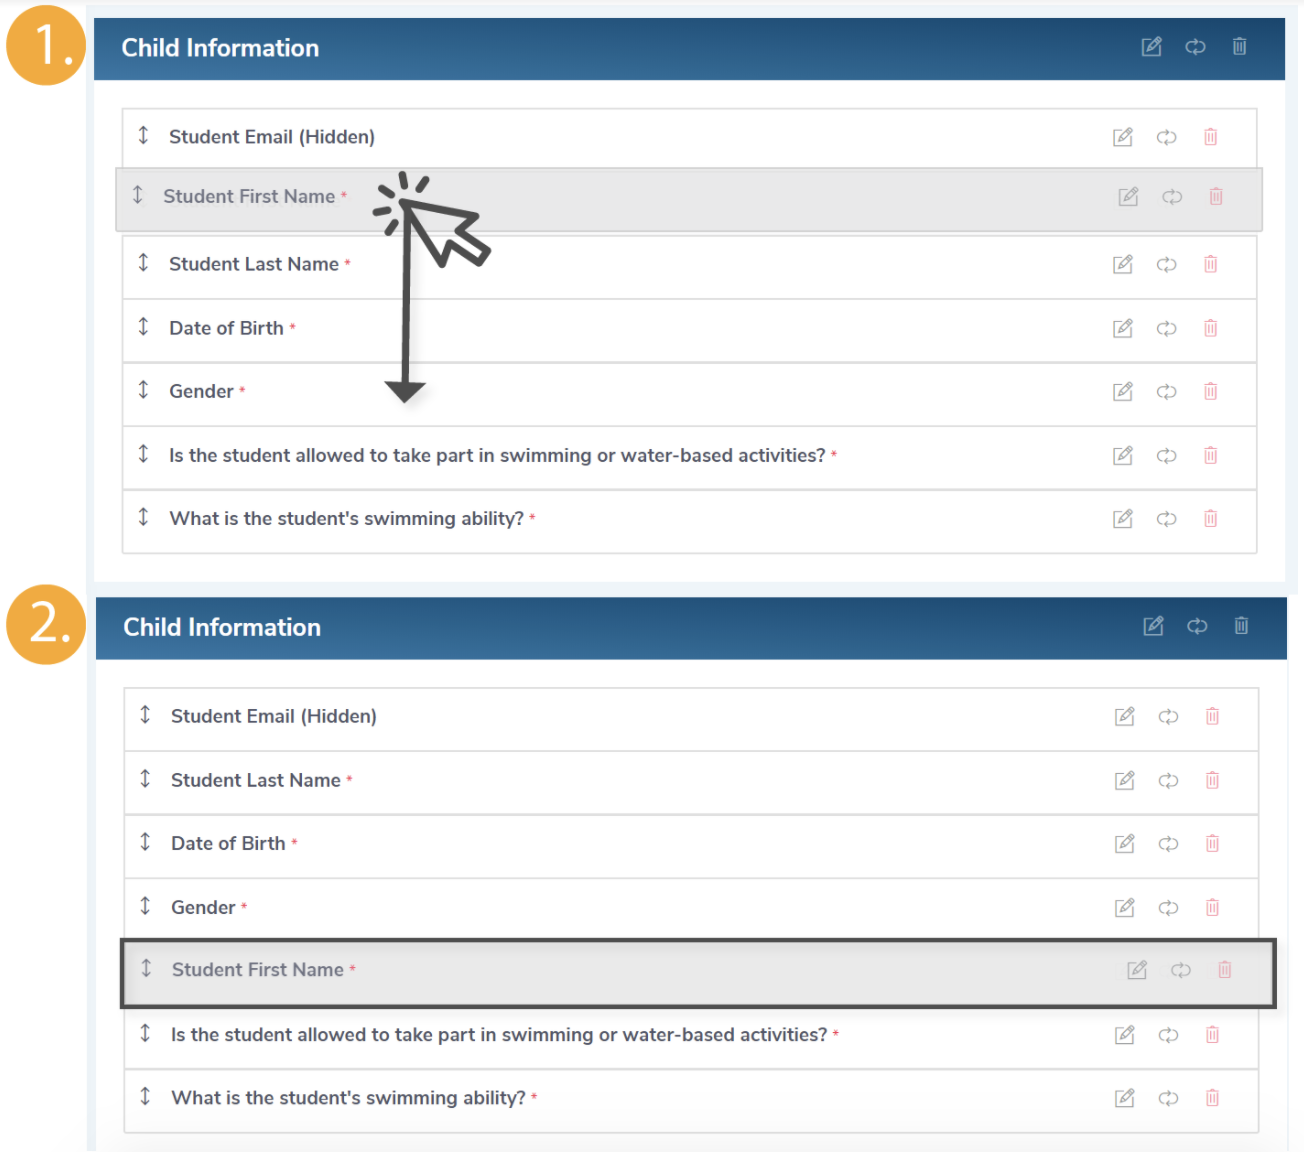
You can rearrange, edit, or delete pre-existing sections using the icons on the right-hand side of each form field.

You can also rearrange the order of the form fields by clicking and dragging them to the desired location.

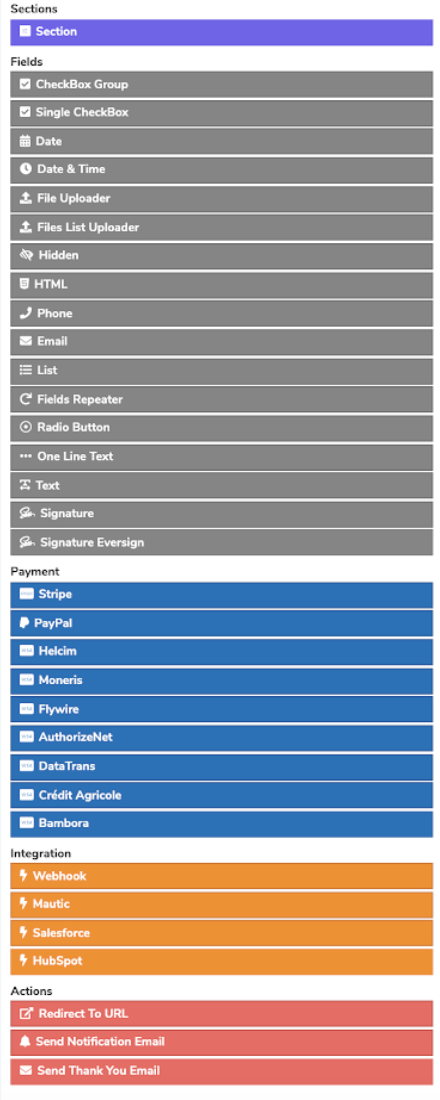
To add new sections or fields, use the right-hand menu. Here, you can also add different payment gateways, integrate your application form with different CRM systems, as well as determine what will happen after a prospect submits an application.

To preview the changes, at the top of the page go to the right section under the application name. Next to the URL, click on the three-dot menu and select ‘View’.

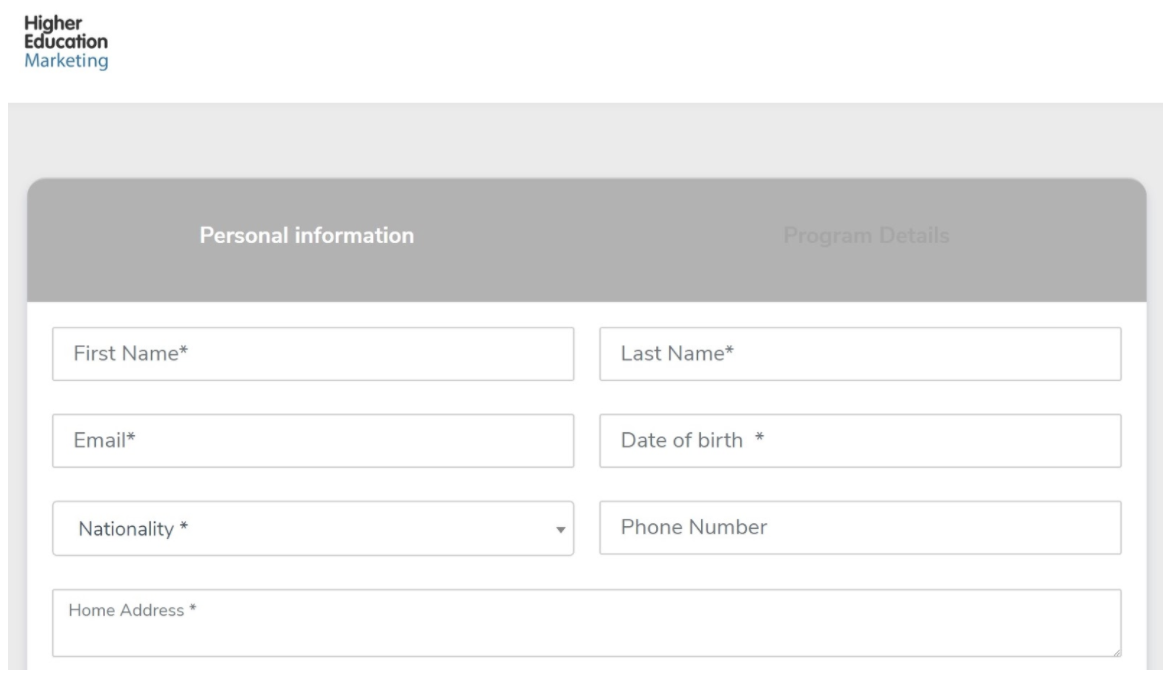
This will show you your application from a student, parent, or agent’s point of view – depending on what type of application you’re editing – in a new window. If you want prospects to log in in order to create a new application, you’ll first be prompted to log in before you can view your updated application.


